


 Watch video


 Sign in with Google
YouTube Strategy
The YouTube video checklist: from idea to publish

TL;DR:
- Most creators treat every video as a fresh start but to grow, you need a repeatable system and a YouTube video checklist
- Validate your idea before you script anything; a quick demand check saves hours of wasted production
- SEO is done before you hit publish, not after, and keyword choice informs everything, starting from your script
- The post-publish window (48 hours) is when engagement signals matter most
- A/B testing titles and thumbnails can rescue an underperforming video
If you don’t have a YouTube video checklist you follow every time, you’re doing it wrong.
Sorry, that sounded harsh. What we’re trying to say is this: every video you make is a brand new opportunity, but you shouldn’t treat every video as a fresh start.
Most creators do just that. They pick an idea, write some notes, hit record, scramble on the SEO the morning it goes live, and then wonder why the numbers don’t move. An inconsistent process will yield inconsistent results.
The creators who grow consistently aren’t necessarily smarter or more talented but they are definitely more intentional. They run the same repeatable workflow for every video they make, which saves decision-making energy for what actually matters: the content itself.
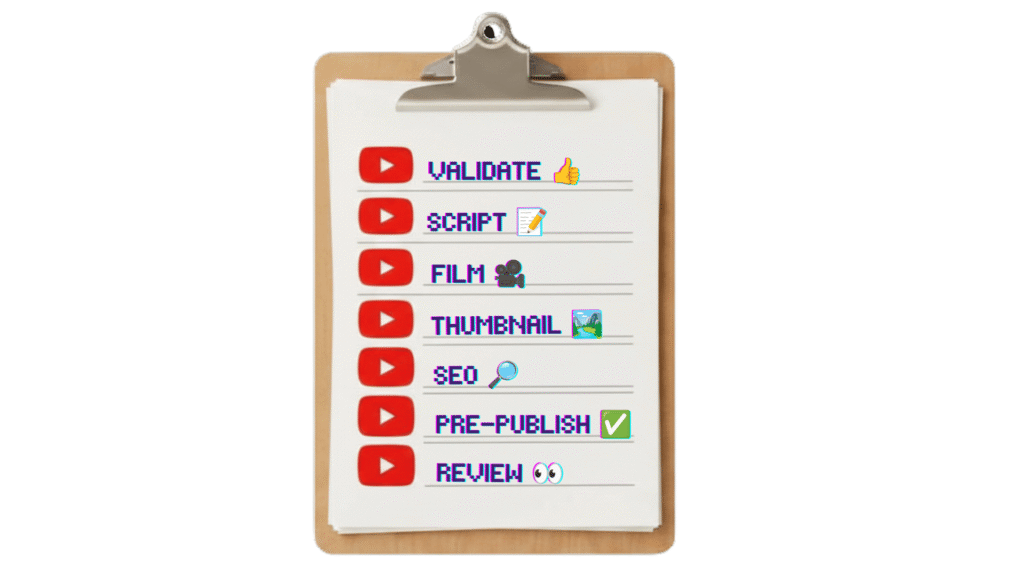
This is that workflow. Seven phases, from validating your idea before you write a single word to reviewing performance in the 48 hours after you publish. You’ll find a quick-reference checklist at the top of each phase, then the full breakdown of why each step matters.
Follow this checklist and you’ll give every video a better shot.
Table of contents
Get an unfair advantage on YouTube
Give your YouTube channel the upper hand and easily optimize for more views, more subs, and more of every metric that matters.
Phase 1: Validate your idea
Too many creators skip this one. It’s easy to do when you come up with an idea you’re excited about. Being excited about a video idea is a good signal but it’s not enough. You need to do a demand check to see if anyone is actually looking for this video.
It takes about 10 minutes. But those 10 minutes can save you a full production cycle on a video that was never going to get traction.
The checklist:
- Can you explain the video in one sentence? Clarity converts. If your video requires explanation, it’s a sign the concept may be too complex for a viewer to click on with confidence. Viewers decide in a fraction of a second.
- Does the idea serve your core audience AND have potential to reach new viewers? A video that only your existing subscribers will understand won’t grow your channel. A video aimed entirely at strangers won’t deepen loyalty. The strongest ideas do both.
- Is there keyword demand? If people aren’t searching for your topic, discovery is going to rely entirely on YouTube’s recommendation engine — where creators have little control. Confirm that real search volume exists before you invest production time. TubeBuddy’s Keyword Explorer shows you search volume, competition, and related terms so you can make this call with data, not instinct.
- Does the video have a clear A→Z? Know where the video starts and where it ends. Viewers need to understand early what they’re getting and what it takes for the video to be “over.” A vague journey loses people before it starts.
For more on finding topics with real search demand, this guide to advanced keyword research techniques walks through the full process, and this post on finding low-competition keywords is worth bookmarking if your channel is still building authority.
Phase 2: Script and structure
You need some kind of script. Even if you’re “yapping.” It can be a tight outline, bullet points, or a full teleprompter read, whatever works for your style. It just has to have a structure. Without one, your video meanders, the edit is harder, and your watch time drops.
The most important part of your script is the beginning. The first 30 seconds, and especially your hook, determines whether the viewer stays or leaves. Write it first. It’s the hardest part, and it deserves the most attention.
The checklist:
- Write your hook in three layers. The first seven seconds confirm: the viewer needs to see or hear something that tells them they landed on the right video. For the rest of the first 30 seconds, establish what the video is and why you’re the person making it. Open a loop: introduce a question or reveal that you’ll answer later. The loop keeps them watching.
- Outline each section with a Problem→Solution rhythm. Every segment of your video should start with a problem and end with a resolution. This creates natural tension and release throughout, which keeps retention high even in longer videos.
- Identify your emotional payoff. The best videos have a message underneath the practical content. Something that stays with viewers even more than the information itself. It doesn’t have to be deep. It might just be the satisfaction of a transformation, or the relatability of a shared struggle. Know yours before you start filming.
If you’re using AI to help draft outlines or generate title ideas, this post on using AI for YouTube covers 11 practical prompts that save real production time.
Phase 3: Filming setup
Within reason, your camera doesn’t matter. At least, not as much as lighting and audio do. A well-lit, clearly recorded video shot on a phone will outperform a 4K video with bad sound and flat lighting. Viewers will leave a video that’s hard to watch or hard to hear, regardless of the content (or how expensive the camera).
This phase takes five minutes if your setup is already dialed in. If it’s not, use this checklist to build toward a setup you stop having to think about.
The checklist:
- Lighting: take a photo before you record. Look at your face. Are there harsh shadows under your eyes, nose, or chin? Is one side significantly darker than the other? Fix that before you hit record. Not in post. Natural light from a window diffused or a simple softbox positioned in front at 45 degrees is a great start.
- Audio: record 10 seconds, then listen back with headphones. Do this before every session. You’re listening for hum, echo, hiss, or inconsistent levels. A lavalier mic, a USB condenser, or even Airpods Pro in a treated room will get you 90% of the way there. The remaining 10% can be addressed in post.
- Background: make it intentional. Clean doesn’t mean boring. Your background is part of your brand. Make a deliberate choice and keep it consistent across videos so your videos are recognizable at a glance.
- Camera settings confirmed before you start. Check resolution (1080p minimum, 4K if your workflow supports it), frame rate (24fps for a cinematic look, 30fps for standard), and white balance. As much as possible, you want presets, not gametime decisions.
- Notes accessible without looking away from camera. Whether it’s a teleprompter app, a monitor with your outline, or index cards just below frame, make sure you can stay on point without making it weird; averting your eyes to read looks shifty and kills the connection.
Phase 4: Thumbnail creation
Your thumbnail is the first thing a viewer sees. It’s an autonomic response. If it grabs them, they might read the title, check the runtime, and maybe watch. A well-crafted thumbnail doesn’t just make a video look good, it does the work of driving the click that SEO alone can’t.
In thumbnails as in life, more is not more. The most common mistake is trying to put too much in the frame.
The checklist:
- Use three core elements, max. Pick: a face or person (ideally with a clear expression), a focal object or visual, and readable text. Three elements, composed so the eye knows exactly where to land. Anything beyond three competes for attention and you’ll lose it.
- Test readability at mobile thumbnail size. Ignore mobile users at your peril. Shrink your thumbnail to the size it appears on a phone screen and look at it from arm’s length. If you can’t read the text and get a sense of what the thumbnail is trying to say, you’re doing too much.
- Create an A/B variant before you publish. Don’t wait until your CTR suffers to start testing. Create two versions of your thumbnail — even if one is just a different color treatment or a different expression. Set up an A/B test in TubeBuddy’s thumbnail testing tool or using YouTube’s test and compare thumbnails on day one. Your first-week traffic is too valuable to leave to chance.
- Your thumbnail should tease, not tell. If your packaging gives away the whole point of the video, there’s no reason to click. Create a curiosity gap to get the click.
For deeper strategy on thumbnails, this roundup of thumbnail tips from top creators covers what’s actually working across different channel styles. And if you’ve never run a thumbnail A/B test before, this guide to A/B testing on YouTube walks through the full process.
Get an unfair advantage on YouTube
Give your YouTube channel the upper hand and easily optimize for more views, more subs, and more of every metric that matters.
Phase 5: SEO before you publish
Don’t leave it to upload time to start thinking about YouTube SEO. At that point, most of your SEO decisions should have already been made. Your YouTube keywords should have been confirmed in Phase 1. They should have already informed your script. Your title and description should be built around them.
We get it, YouTube keyword optimization is not everyone’s idea of a good time. But leaving it to the last minute and rushing it means you’re not setting your videos up for success.
The checklist:
- Confirm your primary keyword. If you didn’t nail this in Phase 1, at least do it before you write your title. TubeBuddy’s Keyword Explorer gives you volume, competition score, and related terms so you can find the exact phrasing your audience is searching for.
- Include the keyword in your title naturally. If the keyword phrase reads strangely in your title, find a version that flows. You’re not just appeasing the YouTube algorithm here; a person has to want to click.
- Open your description with the keyword in the first two sentences. YouTube weights the first 200 characters of your description heavily. Write two strong opening sentences that describe the video and include the keyword phrase, then expand from there.
- Add tags using a mix of broad and specific terms. Tags aren’t the ranking signal they once were, but they still help YouTube understand your video’s context. Use TubeBuddy’s tag suggestions to pull terms that are working in your niche, then layer in a few long-tail variations.
- Run the SEO Scorecard before publishing. TubeBuddy’s SEO Scorecard grades your title, description, and tags against best practices and flags gaps. Get everything in the green.
- Plan your end screens and cards. Decide which videos or playlists you’ll link to before you upload. You can add them after publishing but having them live at publish means they’re working from day one.
For a deeper look at writing descriptions that rank, this guide on YouTube video descriptions covers structure, length, and keyword placement in detail.
Phase 6: Pre-publish final check
You’re ready to upload. Before you click Publish, slow down for five minutes. This is the phase that prevents errors: the wrong thumbnail, a missing category, the title you settled for instead of the one that actually earns the click.
The checklist:
- Finalize the title. Read it out loud. Would you click on it? Does it create curiosity without being misleading? If you’re not confident, spend 10 more minutes here. The title is the most important metadata decision you’ll make.
- Upload your thumbnail and preview it on mobile. YouTube Studio shows you a desktop preview by default. Switch to mobile before you publish. That’s where most of your audience will see it, and that’s where readability problems show up.
- Complete your description, including timestamps. Adding chapters to YouTube videos is worth the effort. Chapters aren’t just about viewer experience — they’re also a huge SEO opportunity as YouTube and Google can surface them in search results. Make sure your description closes with a soft call to subscribe or explore related content.
- Confirm your settings: video category, language, subtitles (auto-generated captions are a start, but review them if the topic requires precision), and the Made for Kids flag if applicable. These are easy to overlook in the scramble.
- Make a deliberate scheduling decision. Premiering a video builds anticipation and gives your core audience a moment to gather. Publishing immediately maximizes early watch-time velocity. Neither is wrong but the choice should be intentional. Check TubeBuddy’s Best Time to Publish data for your channel if you’re not sure which window drives your best early engagement.
For a full pre-publish walkthrough, this post on what to do before posting a YouTube video goes deeper on each step.
Phase 7: Post-publish review
Take a break by all means but don’t just hit publish and move on. The first 48 hours are make-or-break. Check analytics for early signals, respond to comments, and make any adjustments while the algorithm is still doing its initial evaluations.
It’s also where a slow-starting video can be turned around.
The checklist:
- Check CTR at 24 hours. Your click-through rate in the first 24 hours tells you whether your title and thumbnail are doing their job. Compare it to your channel’s average. If you’re below your average, the thumbnail or title needs work.
- Check average view duration at 48 hours. This tells you whether your hook and structure are working. Look at the audience retention graph in YouTube Analytics, not just the overall percentage. A sharp drop in the first 30 seconds means the hook failed to confirm the click. A steady decline through the middle means the pacing or structure needs attention.
- Reply to all comments in the first 48 hours. Comment engagement in the early window signals to YouTube that the video is generating active interest. It also builds the creator-viewer relationship that turns casual viewers into subscribers.
- Check your impression sources. YouTube Analytics shows you where your impressions are coming from — YouTube Search, Browse Features, Suggested Videos, or External. This tells you whether your SEO is working (YouTube Search impressions) and whether YouTube is pushing the video into recommendations (Suggested Videos). Use this data to understand how your video is being distributed, not just how it’s performing.
- Log your numbers. Keep a simple record of your CTR, AVD, and impression sources for each video. Over time, patterns emerge and you’ll see which topics get pushed, which thumbnails convert, which video lengths hold attention. You can’t see those patterns without the data.
- Launch an A/B test if CTR is underperforming. If your CTR at 48 hours is below your channel average, run a title or thumbnail A/B test now. TubeBuddy will split your audience between the two versions and can automatically run with the winner.
For a deeper look at reading your numbers, this guide to YouTube analytics for newer channels covers the metrics that actually matter. And if retention is your weak point, this post on audience retention covers the specific moments in a video where viewers leave and how to make sure they don’t leave yours.
Get an unfair advantage on YouTube
Give your YouTube channel the upper hand and easily optimize for more views, more subs, and more of every metric that matters.
FAQ – YouTube video checklist
Before filming, validate your idea (one-sentence test, keyword demand check), write and outline your script including your hook structure, set up your filming environment (lighting, audio, background), and create your thumbnail concept. Front-loading these steps means you film with intention rather than improvising, which shows up in the final product.
Run your idea through three quick tests: Can you explain it in one sentence? Does it appeal to your core audience AND have potential to reach new viewers? Does keyword demand exist for the topic? TubeBuddy’s Keyword Explorer shows you search volume and competition data so you can confirm demand before committing to production.
Confirm your primary keyword before you write your title, then make sure that keyword appears naturally in your title, in the first two sentences of your description, and in your tags. Running TubeBuddy’s SEO Scorecard before publishing gives you a quick gut-check on whether your metadata is fully optimized.
Check your click-through rate (CTR) at 24 hours and your average view duration (AVD) at 48 hours, then compare both to your channel’s historical average — not to other creators. If your CTR is below your average, your title or thumbnail needs work. If your AVD drops sharply in the first 30 seconds, your hook needs revision.
A/B testing lets you run two versions of a title or thumbnail against each other to see which one drives more clicks. TubeBuddy’s A/B testing tool splits your audience between the two versions and identifies a winner at 95% statistical confidence. Use it when a video’s CTR is underperforming, or proactively on new uploads to optimize before the algorithm decides your video’s reach.
For most creators, a full production checklist adds 20–40 minutes of structured time to the process — most of which you were probably spending anyway, just less intentionally. Idea validation and SEO prep are the biggest upfront investments. Post-publish review takes about 10 minutes at 24 hours and another 10 at 48 hours.


