


 Watch video


 Sign in with Google
YouTube Strategy
How to Post YouTube Videos on Instagram
So, you’ve been creating awesome content for your YouTube channel! But are you getting the most out of your videos? Building a following takes a lot of work, and promoting your YouTube content across social media channels is a great way to increase your reach.
Why is Cross-Posting Content Beneficial?
Cross-posting content across your social media channels allows you to reach a wider audience with your videos than you might have otherwise been able to. It means that you’re building a brand beyond the confines of YouTube, while directing more traffic back to your channel. Plus, having a following on social media that’s at a similar level to your YouTube following legitimizes your brand for potential sponsors.
Instagram is an awesome platform to be sharing your YouTube content on–it currently has over 1 billion active users, the format of the platform is specifically designed for sharing visuals, and Instagram Stories allow content to be promoted and shared easily. It’s also monetizable, so if your Instagram page becomes very popular, you have one more potential revenue stream from your content.
Instagram’s Constraints
There are a few constraints that need to be worked around in order to start posting YouTube videos to Instagram. There is the timing constraint–Instagram only allows videos up to 60 seconds for posts, and only allows videos up to 15 seconds for Instagram Stories. Instagram also has a 1:1 aspect ratio, where YouTube’s is 16:9. These requirements might stop some YouTubers from cross-posting, but it shouldn’t stop you!
There is an easy workaround to help you post your YouTube videos on Instagram in segments–this workaround allows you to create short, “meme style” square video posts. These videos have white padding, a title above the video, and captions below the video. This type of video gets more engagement on Instagram because you can embed a call to action above the video, and captions help reach social media browsers with the sound turned off. Here’s an example of what the final output will look like: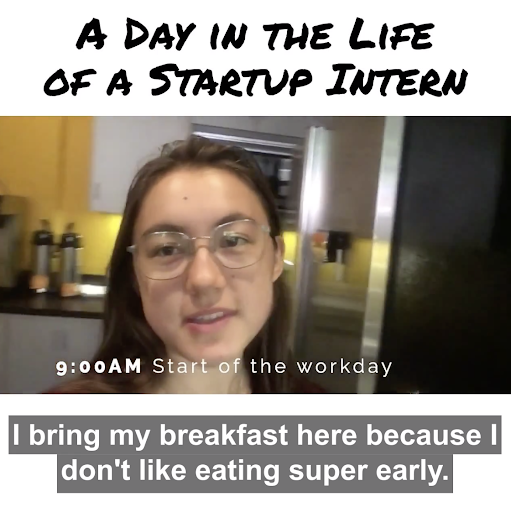
For this guide, I’ll use a free online video editor called Kapwing. There are other programs that you could use to achieve a similar result, but Kapwing is faster than downloaded software like Adobe Premiere, it’s really user-friendly, and it’s free.
There are four steps to create the perfect Instagram post from your YouTube video:
Step 1: Import the Video
Open Kapwing’s Studio by going to the Kapwing.com homepage and clicking “Get Started.” Copy the URL of your YouTube video and paste the URL into the box on Kapwing’s import page. You can alternatively upload an MP4 if you have the file on your phone or computer..png)
In my example, I’m taking a YouTube video that’s 4 mins and 31 seconds long. To upload, just copy the video URL and paste it into Kapwing (your video has to be less than 30 mins long to import directly onto the digital canvas)..png)
Step 2: Trim Out the Section
Instagram allows video uploads between 3 seconds and 60 seconds for posts. So, you can either choose one highlight segment of your video to feature on Instagram, or you can break it up into 60 second chunks and post the video as a gallery. Posting a highlight segment means that you can direct traffic back to YouTube for people to watch the entire video–but you also run the risk of losing total views, because a percentage of people won’t switch to YouTube to watch the full video. Likewise, posting the entire video in a gallery means that people can watch the entire thing on Instagram, but it also means that your audience is less likely to look up the video on YouTube.
For this example, I trimmed out a 44 second clip from the video to feature on Instagram. Just hit “Trim” either on the right side of the video or on the bottom toolbar, adjust the start and end time, and click “Done Trimming” once you’ve selected the desired segment..png)
Step 3: Make Square and Add Title
To make your video segment fit into the Instagram square format, use the “Resize” button on the bottom toolbar to change the aspect ratio of the digital canvas to 1:1. You can either crop your video to square or drag the edges to show the full video with white padding around the edges. I wanted the padding so that I could use the top blank space for a title, and the bottom blank space for captions..png)
Consider adding a title or a call to action above your video. Text gives the Instagram browser a reason to tap on your video from the Explore feed and stop scrolling to watch. In Kapwing, you can change the size and position of the text layer and the font, color, outline, and style of the text itself. In my example, I changed the font to “Permanent Marker.” Kapwing also allows you to insert shapes, images, logos, watermarks, and other visual elements on the canvas. I inserted the Instagram logo using the “Images” tool to search for the image I wanted. For Instagram Pros, you can also append a custom thumbnail as a separate scene at the beginning of your Instagram video. Since Instagram doesn’t allow custom thumbnail uploads, you want to include it as the first frame of the video. You can find another tutorial here on custom Instagram thumbnails..png)
This same technique works for vertical videos for Instagram Story or IGTV, if you want to repurpose your YouTube videos across social media platforms. Just choose the “9:16” option from the Resize menu..png)
Once your video looks right visually, click the DONE button to process your video. You can always edit it later to correct typos, cut out a different segment, or make a different size. If you’re adding a full video as a gallery of 60-second segments, download your first segment, click “Edit,” and change to the next segment of the video. Press DONE, download this segment, and repeat the process until your whole video has been broken up into 60-second chunks.
Step 4: Add Subtitles
Did you know that 80% of people on Instagram browse with the sound off? If you want to reach a modern audience, you need to add subtitles to your Instagram videos so that viewers can follow along without audio. Kapwing makes it simple with a specific Subtitle Maker tool that burns subtitles directly into your Instagram video. It’s a useful resource for any video going on a platform like Twitter or LinkedIn that doesn’t support subtitles.
Upload your square video to Kapwing.com/subtitles. For a short video, I recommend manually typing out the caption text that you want to appear on the bottom of the video. You can also upload an SRT file or use the “Auto-generate” button to get AI-powered transcription in minutes, for free..png)
In the left-hand panel, adjust the style of the subtitle text to make it smaller, change the color or font, or adjust the background style. You can experiment with the different background options – wrap, full, and outline – to find one that you like.
After you’re done captioning the video, watch it through one full time to correct any mistakes or typos. Then, click “DONE” to process the video and add the subtitles permanently into the MP4.
After your captioned video has been processed, it’s ready for Instagram! Download the MP4 and publish it from your phone, or schedule it for later.


